![]()
Shop by Category


Comes with a free instructional DVD.
This unit does not plug into the wall. I repeat, it is battery operated only.
BASIC INFO
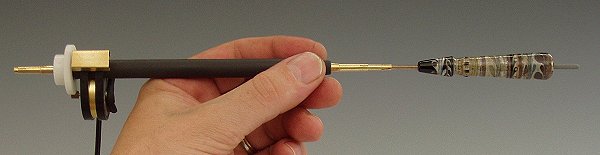
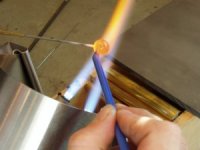
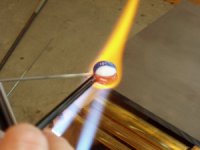
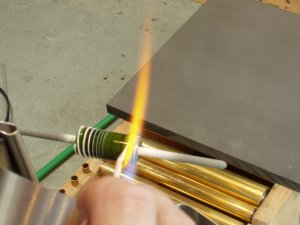
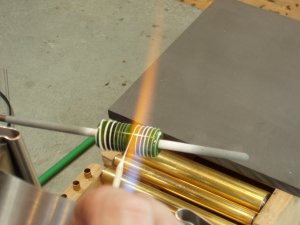
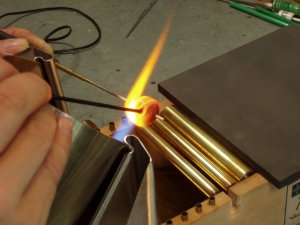
The EMS-2 virtually eliminates the finger motion needed for spinning lampwork. The relief to your joints and muscles that comes from not having to spin the mandrel is dramatic. The EMS turns an axle, holding various size mandrels (1/16" - 5/32"), with an electric motor and gears.
Operates on two D-cell batteries that will last you 80-90 hours! This unit does not plug into the wall. I repeat, it is battery operated only.
The EMS has a set top speed, but you can infinitely vary the speed from zero to wide open. Your fingers provide the speed control for the EMS through a clutch system. A gentle squeeze provides enough friction to slow or stop the rotation, depending on the amount of pressure applied. To advance your bead to another position, simply release pressure slightly and it will slowly turn beneath your fingers. When it gets to the position you want, stop it again.
Aside from the great control and ergonomics, a whole new world of possibilities are now available to you. Twisty canes....fast, tight, and easy. Your marvers become "power" marvers. Color mixing...easy, consistent, bubble free. Even heating.....faster beadmaking and dots sink in evenly and quickly. Spacer "work-horse". Fast core-building leaving you more time to decorate. Power Raking/Feathering - neat effect! Use mini-jacks to work the glass like a potter on a wheel. Tack a stringer and wind it around your bead quickly and evenly for a consistent spiral.
Scott has been able to double his bead production while achieving amazing precision and consistency. It can be used in the right or left hand....you just switch the direction of the spin using the reverse switch.
How do I choose what size shaft to order?
Shows Regular size shaft and Petite for smaller hands.
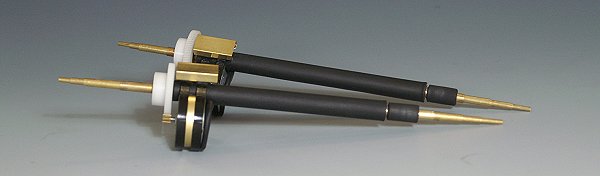
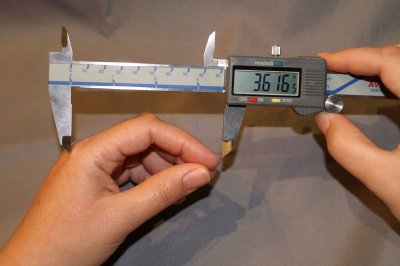
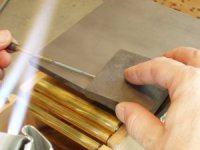
Here is how you can tell which size of shaft to choose. Use a set of calipers or get a ruler and put your hand in this position, but make sure it is a position that feels comfortable and normal to you, very relaxed. Basically you are bringing your thumb, forefinger, and middle finger together so they are touching lightly....as if you were holding a pen. This is my hand (Monica here) and my measurement came out to 3.616". I seem to be the cut-off point. If your measurement is the same as mine or lower, you would want to order the petite shaft size. Larger....you order the regular size shaft. This helps the tool to feel more balanced in your hand.
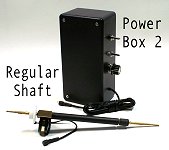
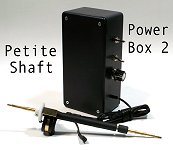
Power Box Two...Rheostat (speed/torque control), On/Off/Reverse, and High Speed (Doubles Voltage - second battery. Great for flaring, burnishing silver, making tight and fast twisties, and is great for tack and spin.)
WHAT SIZE MANDRELS CAN I USE WITH THE SPINNERS?
**Your mandrels are held within telescoping brass tubing. Each sleeve holds a corresponding mandrel size. So, when you change what size you are working with, you simply, yet gently, remove or insert the necessary sleeves.
***Here are some examples (This is a slide show that shows five pictures. If it is still, then refresh your browser.)
 Video Clips on YouTube
These short video clips show the Electric Mandrel Spinner in action.
Some example titles are shown below.
Our Video Clips on YouTube
These short video clips show the Electric Mandrel Spinner in action.
Shows speed and how easy it is to make multiple beads at once.
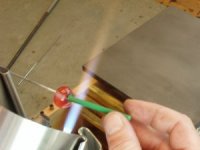
Dot Application
Shows stop and go dot placement.
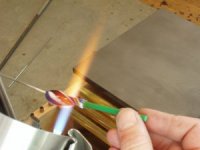
Melting In Dots
Shows even heating and how steady spinning can keep fluid glass under control.
Dot Application
Shows stop and go dot placement.
Melting In Dots
Shows even heating and how steady spinning can keep fluid glass under control.
Quick and easy spacers. Multiples!! Helps to increase your sales by making your sets go further.
Removing the Mandrel
Removing the Mandrel
How to insert mandrels.
Speed Control
Shows my preferred technique for speed and position control. This is an older video. The new models have a rubber clutch that you grip where you see Scott's finger coming together here. The rheostat dial on your power box will control your "set" spinning rate.
Power Marvering
Two examples of "power marvering."
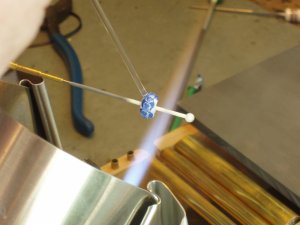
Color Mixing
Shows my preferred technique for speed and position control. This is an older video. The new models have a rubber clutch that you grip where you see Scott's finger coming together here. The rheostat dial on your power box will control your "set" spinning rate.
Power Marvering
Two examples of "power marvering."
Color Mixing
Shows how well the tool will help you to mix colors.
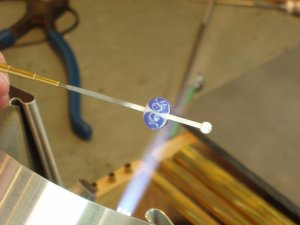
Shows stringer application.
MORE INFO AND PICTURE LINKS
ERGONOMICS
The ergonomics of all of my tools were designed with the whole upper body in mind, not just the hands. The typical spinning position finds the lampworker with the palm down and the elbow raised up and to the side. Whether resting on an arm rest or not, this creates tension in the shoulders, arms, and wrist. By turning ones hand over and holding the tool in pen-like fashion, one can keep their work oriented to the flame as they always have and the still have the control they need while their arm is more at rest. The elbow can drop to the side to relieve stress on the shoulders and upper arms. The wrist comes into alignment and of course the fingers are not in constant motion.
One of the missions of these tools are to enable the artist to continue producing comfortably and healthfully for as long as they choose. It would be tragic for anyone who would have to stop making beads. Think of all the discoveries and insights that would be lost.
If you develop carpel tunnel or arthritis and move onto something new, that discomfort and pain would follow you and in fact, weve found that many lampworkers have come to lampworking with these problems already. Repetitive motion is a serious concern. Think of how excited the Potter was when the electric wheel was created. The Kick-wheels Im sure must have caused a lot of knee pain. You still have the control over the art, you just are working smarter and more comfortably now with the long term in mind.
SCIENCE/THEORY OF THE SPINNERS
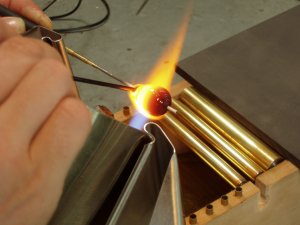
Spin Control- The gravity control mechanism for lampworking glass. When a balanced bead is turned steadily on a horizontal axis, it is being affected by gravity evenly throughout its circumference. The effect is that gravity doesn't have a chance to act on any one portion of the bead any more than another. In this state of anti-gravity, the surface tension of the bead can be released, while control of the bead can be maintained easily. Through surface tension, glass naturally wants to seek a balance state between the amount of glass in the bead, and the length of its footprint on the mandrel holding it. As surface tension is released through heating, the spinning glass will tend toward that balance. Like a bubble tends towards a round shape, glass does the same, save for the spinning mandrel. But, uneven gravity/spinning can affect the bead by throwing it into a state of wobble. Which in turn can be corrected by turning up/on the force of gravity in the right spot, slowing / stopping the spinning, and letting the glass shift into balance. Lampwork bead makers have always needed good spinning abilities, but the human hand is simply not capable of turning a mandrel as smoothly, stably, and regularly as the EMS-2. The spin control of the EMS-2 allows one to get in control, and stay in control of ones lampwork. Remaining in control as much as possible is essential to efficient lampworking, where a lot can go wrong fast. After all, lampworkers are creating art by controlling a liquid on a rotating stick. That can't be considered easy. The better your control, the better your efficiency.
Heat Control - The glass flow-controller.
In lampwork bead making, heat control comes naturally with even steady spin control. Just like gravity, heat comes from one direction. A bead turning briskly and steadily next to or within a flame has all portions of its circumference in the flame for the same amount of time each turn. This even heating results in smooth transitions between the solid and flowing states of glass surface tension. Melting designs into your beads has never been easier to control. And when you are in control, you can work more efficiently. Less wasted time re-centering beads.
In lampwork bead making, heat control comes naturally with even steady spin control. Just like gravity, heat comes from one direction. A bead turning briskly and steadily next to or within a flame has all portions of its circumference in the flame for the same amount of time each turn. This even heating results in smooth transitions between the solid and flowing states of glass surface tension. Melting designs into your beads has never been easier to control. And when you are in control, you can work more efficiently. Less wasted time re-centering beads.
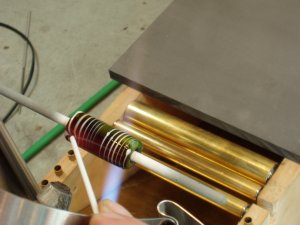
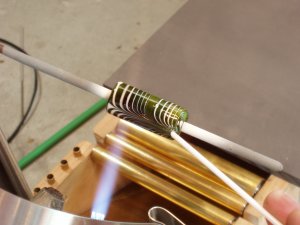
Making Special Glass Canes
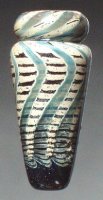
PULLING TWISTY CANE - You can use the spinning action of the tool when pulling your twisty canes for precision winding. You can even feel the changes in the glass as it hardens and compensate by adding heat to keep a cane twisting. Here is an example of a bead on which I have used a very tight twisty cane. I was also easily and quickly able to shape this bead into a cylinder using my rolling marver.
VARIEGATED CANE -
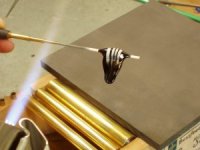
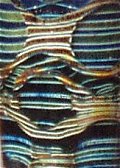
FEATHERING- Feathering designs around the bead is so easy and quick. Just heat the side and touch the tip of a cool-ish stringer to it as it rotates. The tool has enough torque to shift the glass while you just hold on for a second then pull free. With a little practice you can do it evenly and without changing the shape of your bead.
RAKING -
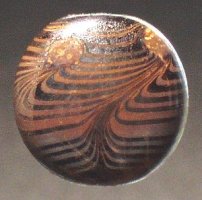

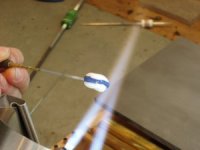
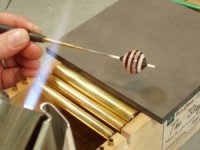
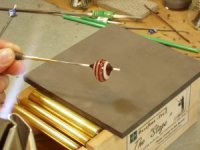
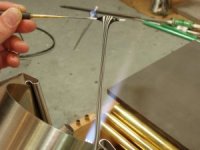
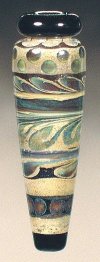
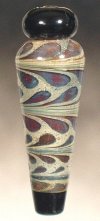
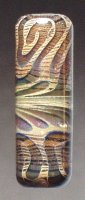
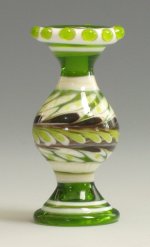
TACK AND SPIN - Continuous rotation allows you to spin glass around your bead with absolute control. Gently touch a little gather to your bead and use the spinning action of the tool to draw the hot glass onto your bead. With a little practice, you can even pull glass from your stinger as thin as a spider's web without breaking the connection. All of those lines on the beads below are actually one long application of glass continually drawn from a stringer. The action is like a fishing reel winding line onto it's spool.

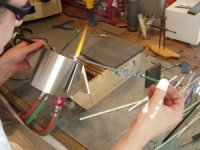
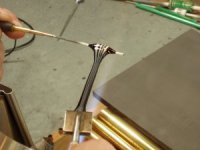
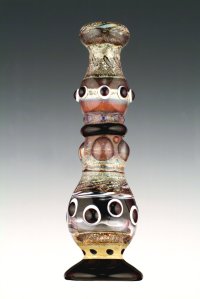
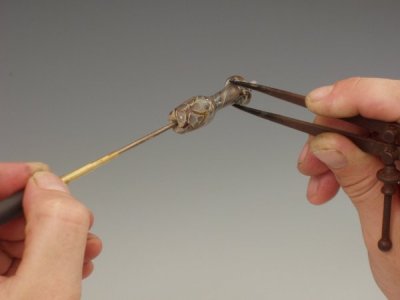
USING MINI JACKS - While your bead is molten, you can use a tool like this one to actually pull the glass. In this photo I have used the jacks to make a long neck and the extra glass is shaped at the top. This concept is very similar to a potter working clay on a wheel with their hands.
CORE BUILDING - Just heat a gather of glass about the same size as the core you want, barely touch it to the spinning mandrel and the power of the tool will transfer the glass and form a bead naturally, with perfect feet and dimpled ends in seconds. A well made core makes the rest easier.
ACCURATE COLOR MIXING- Because the glass can be continually spun, it can be worked hot and very fluid without losing control. It makes for repeatable color-mixing recipes and bubble free stringers fast. As long as the mandrel keeps spinning, the glass keeps mixing.
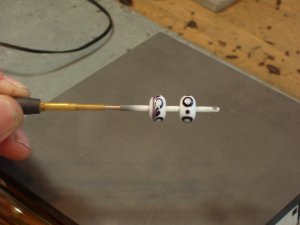
SPACER WORKHORSE- You can make multiple spacers on a single mandrel quickly and consistently. Making consistently sized and shaped beads is easy. All you need to do is transfer consistent volumes of glass from your cane to your mandrel for each bead.
ULTRA-THIN ENCASING- With newfound control you can use the tool to spin the bead as you feed a stringer through the flame and right onto the surface. With practice, this technique makes it easy and quick to add punch to your beads with a thin layer of clear bubble free glass. This technique can be used to make layers of color.
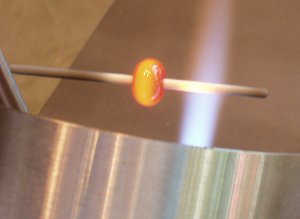
EVEN HEATING- Dots melt in clean and uniform because even heating relaxes the surface-tension over the whole bead surface. Nothing gets to sink in first, it all happens simultaneously.
COLD WORK- One can use the spinning action of the tool to apply etch resist or paint to the bead. It's great for lines around the bead and makes wonderful spirals down it's length. Great for applying electroforming paint in a new way.
sorry, no photo for this technique.